
Today we’re going to look at one of the most common goals in fitness: Doing a push-up for the first time. We’re also going to take it beyond the singular push-up, and look at doing push-ups. With an s. Plural. Sets of push-ups. And we’ll figure out how to make them this easy:

If there’s one rule to practicing push-ups, it’s this: practice. It’s that simple. You have to practice getting strong enough to do a push-up, or a set of several push-ups. What you practice matters.
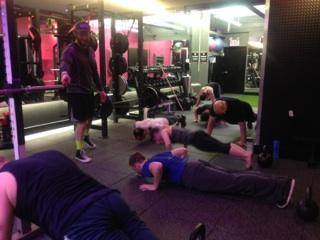
Recreating the same motion of a push-up is great, but if it involves doing a variety of high-rep exercises with minimal weight, you’re not going to get anywhere. 20 reps of a dumbbell bench press with 3lb hand weights isn’t going to make you stronger. Doing rep after rep of well-intentioned but technically inefficient modified push-ups is not going to make you stronger. You have to do challenging reps to get better at push-ups. Here’s an example of what NOT to do:
All of the exercises that I recommend today will replicate the motion of a push-up, and I’ll consider them two categories: Technical practice and strength practice. The first three are all variations that I consider strength practice. That is, they develop general strength before challenging the technical movement of a push-up. The second three variations are technical practice, getting you on the ground to practice push-up technique. By combining both types of exercises, you’ll progress your strength and technique to master push-ups.
The first three recommendations I’ll make allow you to practice the the upper body action of the push-up while reducing the challenge of the plank. You see, the push-up is a plank. It’s a plank when your arms are straight, and it’s a plank when your arms are bent. It’s a plank the whole time:

The first issues that appears for most pusher-uppers is that they can’t maintain a plank. I don’t mean that they’re can’t hold a plank, but that they lose that plank position the moment they descend from straight arms to bent arms. It ends up looking something like this:

Losing the plank is a surefire way to limit your ability to practice push-ups. It’s important, so coaches and trainers emphasize the ability to maintain a straight-arm plank as THE training goal for those who want to develop their push-ups. It’s important, but it’s not SO important that you should only be doing push-up planks. That doesn’t teach you to maintain a proper plank while your shoulders are moving. My favorite drill to practice “push-up technique” isn’t even a push-up. It’s actually a row:
An inverted row with a TRX (or other suspension trainer) makes it easy to adjust for two essential things: Maintaining the stiffness of a plank and the fluidity of shoulder movement. I’ve yet to see someone who is strong at inverted rows fail to hold a solid plank when they practice push-ups. It strengthens the upper back, but more importantly, replicates the pattern in a beneficial way. Your row is a plank, which is a push-up, which is a plank. It comes back to that core stiffness.
Spending too much time on your plank makes two fundamental mistakes though. Mentally, it can get really boring. How many minutes do you want to spend staring at the floor? Physically, it can fail to strengthen the muscles that are involved with pressing in the first place. For both of those reasons, I like to use other pressing exercises as part of the learning process. Impressive, right?

Today I’ll share with you my three favorite push-up exercises for you if you’re practicing push-ups for the first time. The first two are actually dumbbell pressing variations, while the third is an incline Smith Machine press. Let’s take a look at the DB Floor Press first:
The big thing that I LOVE about the floor press is that you’re so well grounded during the lift. You can get great feedback from your back along the ground, and I’ll bet you feel pretty damn close to a neutral spine while you’re pressing. This is a great place to start if you feel rock-solid in your plank, and like jello when it moves. Focus on the upper body strength of the floor press. Once that initial range of motion feels well controlled, move on to the dumbbell bench press.
As the name would suggest, you’re now laying on a bench to press. In the video you’ll notice that my elbows can now drop below the height of my shoulders, and that extra range of motion makes the bench press more similar to a push-up than the floor press is. Assuming you practice using similar weights, you’re getting stronger already!
As the dumbbell pressing variations feel more comfortable, we’re going to take that general pushing power and return to our hands for push-up practice. Rather than starting with our hands on the ground, let’s start a little bit higher. This will help you practice the plank that you’re already good at, while incorporating the shoulder mechanics of a gorgeous push-up. One of my favorite machines for this is the Smith Machine…actually, this could be the only thing that it’s good for.
You can easily lower the Smith machine as any given level begins to feel easier, and this is easy to replicate with a regular barbell and squat rack. If you’re going the push-up route without access to either machine, don’t worry; Using your stairs at home can come pretty damn close.
If you feel like a champ during your planks, but the movement of a push-up catches up to you quickly, use the dumbbell floor press, the dumbbell bench press, and the incline push-up to strengthen that movement before getting on the ground to attack those reps. If you have great pushing power but the plank of your push-up requires some improvement, we’re going to look at a three step strategy to improving that plank. The idea for this came from an e-mail from Steve Bergeron of AMP Fitness in Boston. Check it out if you’re in Boston!
So you can press, right? Great. Let’s start there, and take the plank away from you. We can do this by putting a foam roller beneath your thighs, above your knees. The lever arm, between the roller and your shoulders, is much shorter than your body. The plank is less of an issue, while you can reinforce that strong pushing pattern.
As the roller above the knees begins to feel less challenging, we can increase the challenge of the plank-within-the-push-up by increasing the lever arm. This means that foam roller can move lower, and for this next step, we’re going to forgo the roller and come down to the knees. Here’s an example of a modified push-up, performed from the knees.
As the modified push-up becomes easier, you may have the urge to straighten out those legs into a traditional plank. Great, try it! If you’d like another step in between, place that foam roller below your knees, so that your shins are on it. The lever arm is still shorter than a traditional plank, and it continues to grow.
The next step that I have from this modified push-up is to rise to your toes. Set a solid plank from your heels to your hands. You’ve had great practice with your dumbbell presses and push-up variations that you’ll be rocking push-ups like a CHAMP.
Doing push-ups is a challenge, and accepting that challenge can lead you to a stronger, healthier body. Whether you’re looking to perform your first single beautiful push-up, or endless repetitions, practicing these movements can lead you towards better movement and better results. These progressions may take several days, weeks, or months, but practicing movement on a regular basis is key to getting stronger. Picking appropriate movements to practice makes them even better and helps develop sustainable strength.
Incorporate these moves into your workouts, and be prepare do to work hard at them. Workouts almost always feel better when it’s a social experience. Please share with your friends who may be joining you for your push-up adventure!


Leave a comment